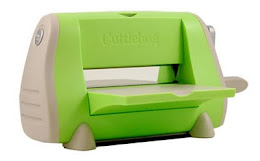
I was watching HSN one day during their Scrap/Craft week and was blown away by this product they were showcasing. Of course, I wrestled with my conscience about spending more money for more craft supplies wondering if I was just getting sucked in by the HSN hype, or was this a sound investment.
I went through the same thing when I saw the Cricut Expression being sold on HSN in April of 2009, as I was undecided if I was making a sane decision about purchasing such an expensive craft product. I can honestly say, I don't regret getting my Cricut Expression machine, and it was worth every penny, since I use it daily to make cards.
From the demonstration of this kit that I witnessed, it seemed too good to be true...make my own acrylic stamps?!?!? Yes! And not just from the templates included in the kit, but from any graphic I choose to use or develop printed onto the clear tranfer sheets also included with the kit. So, that means, I can create my own personalized logo!

What is Stampmaker? PhotoCentric and Teresa Collins Designs have teamed up to bring you the Stampmaker. This revolutionary machine will change the way you create. It will allow you to create your own custom clear polymer stamps, stencils and embossing dyes. This kit will include exclusive Teresa Collins designs for your own personal use. You will also be able to create your own custom designs. All instructions will be provided on the included CD.
Here is a demonstration video from Teresa's blog page that is posted on YouTube:
So, in a nutshell what this all means is, if you want a stamp made from a graphic you love, a favorite drawing, or your own artwork, and if you can print it out, you can make an acrylic stamp out of it! That's all there is to it, providing you follow the step-by-step procedure for good results. Here is a handy tip I found for printing out your artwork:
TIP: With ink jet film, you can hold more detailed images and photographs but it may take a little time to find the right settings to print black enough. If your negative is not black, light will come through and harden all of the gel, not just your image. It is advisable to optimize your printer settings to make your print dark black.
Print settings (most critical factor in making good stamps).
a) Select black ink (greyscale) not color. For color printers set it to print, black cartridge only.
b) Increase the ink volume to 300 dpi or 600dpi for a denser dot pattern.
c) Change the paper setting to photo paper.
All printers vary, to find your optimal paper setting print small boxes using different paper settings, e.g. plain, photo paper matte, brochure paper and use the darkest.
Before use, look at your artwork against the light, if it lets light through consult the printer instructions on the CD or touch up artwork with permanent pen. Alternatively, if film, print it again and stick the second sheet on top to ensure total blackness (be careful to align correctly), or use plain paper instead of film.


