Giving Thanks

Here is my first attempt at using the Seasonal Thanksgiving Cart.


I used a beige-toned piece of 12x12 cardstock and cut it down to a 7" width x 10" length to fit my envelope. I used a brown piece of cardstock (lightly scored around the edges) as background cut slightly larger for an embossed piece of beige-toned cardstock that was cut roughly at a 5¼" width x 4¼ length. I used the Cuttlebug "Flower Fantasy" embossing folder.

I used my CDS to cut out the phrase "Harvest Blessings" at W=6.5" x H=3.25" and used an adhesive rhinestone to dot the "i" in Blessings and used stickles on the leaves.

I left the inside blank so that I could write a nice note.

Thank you for viewing my blog. I hope it inspires you to make your own wonderful cards.
NEW October Cricut cartridges!

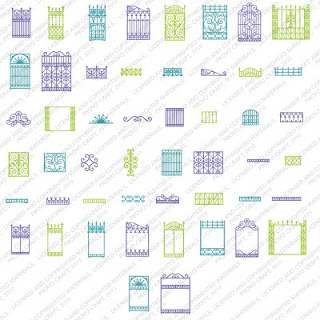
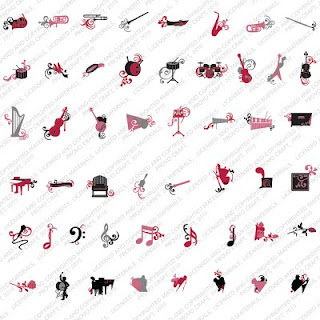
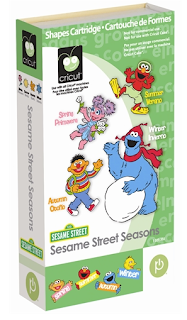
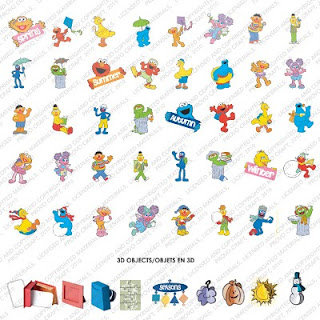
Cricut Hello Thursday announced the following new carts: Car Decals, Ornamental Iron, Paperlace, Quarter Note, Sesame Street Seasons, and Wrap It Up.

Also, my crafty friend, Joy of Obsessed with Scrapbooking is having a giveaway contest for the Christmas Card Mini Cartridge, and the Christmas Village Mini Cartridge. How to win? Leave a comment on her blog for chances to win, or subscribe to her blog. She lists 5 ways to win for extra chances. Good Luck All!

(This Cartridge is exclusive to CricutMachine.com)


(This Cartridge is exclusive to CricutMachine.com)


(This Cartridge is exclusive to Michaels Craft Stores)


A selection of these new carts available at CricutMachine.com

Which is your favorite? Mine is ALL OF THEM!!
:D

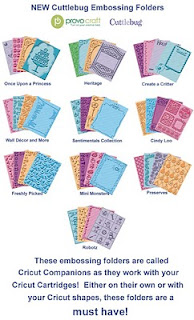
There are also some new New Cuttlebug Companion sets out.
(click on the picture below to enlarge).

You can view all the complete Cuttlebug companion sets on the Cricut.com website.

Halloween cutouts with SCAL

I'm getting ready to make some great cuts with my SCAL (Sure Cuts A Lot) software using the FREE SVG cut files from their blog site.


Here is the link for some of the free cut files:
Grim Reaper
Bare Trees
Bats
Monster Mash
"Happy Halloween" was typed directly onto screen using Old English font.

I will be posting results as I go along...Happy Haunting all!

Halloween Minis

In the process of making Halloween cards, I was trying to think of how I could quickly make some little note cards for my co-workers and attach a small piece of candy...this is what I came up with. After it is cut, scored and folded, it makes a cute 2" mini card.

This is the outside view


This is the inside view


(I stamped the inside with this cute stamp I got for .50¢ at Big Lots)


Here is an alternate card view with other stamps used.


I used the "Wild Card" Cricut cartridge,
selecting the Pumpkin key (as shown here)


I used an orange-colored piece of 12x12 cardstock from a DCWV matstack


I was able to get 6 cuts on a 12x12 mat using my CDS (Cricut Design Studio)


These are the cutting dimensions


Sample cut on beige cardstock


The finished look, ready to embellish to your heart's desire!


I also had a little fun and stamped the back.


Other stamps used:
This set is from the "Too Cute To Spook Clear Stamps"set from Oriental Trading


This set is from JoAnn's Craft Store

Category: 0 comments

Engagement Cards

I made two simple cards on the quick for an engagement party I was going to; one for me to give and one for my Aunt to give. Here are the results.


Card No. 1


Inside of Card No. 1


Card No. 2 (inside was left blank)


All paper used was from the DCWV "Luxury" matstack
Cricut "Wedding" Solutions cartridge was used for shapes;
the phrase "Engaged" was made using SCAL software and an installed font;
Martha Stewart "Floral Vine" Border punch used on edges of cards.


Martha Stewart Eyelet Lace Punch Around The Page used around "Engaged" phrase

Get Ready, Set, Boo!

Time to get those Halloween cards together.
Got my supplies out, got my cricut cuts out...now, where to start?


I put together one of my cuts from the Pumpkin Carving cartridge
with a graphic of flames as the background on a black card from
JoAnn's Craft Essentials set of 10 textured black cards and matching
black envelopes.

I googled the key word "flames" and found this nice picture
to use for my backgrounds. I printed out 4 on a page at 3.5 x 5 dimensions
using the "Photo Printing Wizard" that comes with Windows Picture Viewer.


For the top inside of the card, I printed out the words
"Happy Halloween" from the Happy Hauntings cartridge
on red gliiter paper from a DCWV glitter matstack
that rests on the shadow phrase in black cardstock
by selecting "Phrase" and the Frankenstein image on
the cricut keypad (shown below).


Here is a view of the finished card adding a glitter ghost.


This is the inside view of that same card.
Not sure what other goodies I will add to this card,
because the possibilities are endless.

Here are some other cards I made with the Happy Haunting cartridge:


Thank you for taking the time to look at my blog,
and I hope it inspires you to make your own wonderful creations!


Category: 0 comments